2.8 KiB
| layout | title | nav_order |
|---|---|---|
| default | Getting Started | 2 |
Getting Started
Authelia can be tested in a matter of seconds with Docker and docker-compose.
In order to deploy the current version of Authelia locally, run the following command and follow the instructions of bootstrap.sh:
$ source bootstrap.sh
Then, start the Standalone suite.
$ authelia-scripts suites setup Standalone
A suite is kind of a virtual environment for running Authelia in a complete ecosystem. If you want more details please read the related documentation.
Test it!
After few seconds the services should be running and you should be able to visit https://home.example.com:8080/.
When accessing the login page, since this is a test environment a self-signed certificate exception should appear, it has to be trusted before you can get to the home page. The certificate must also be trusted for each subdomain, therefore it is normal to see this exception several times.
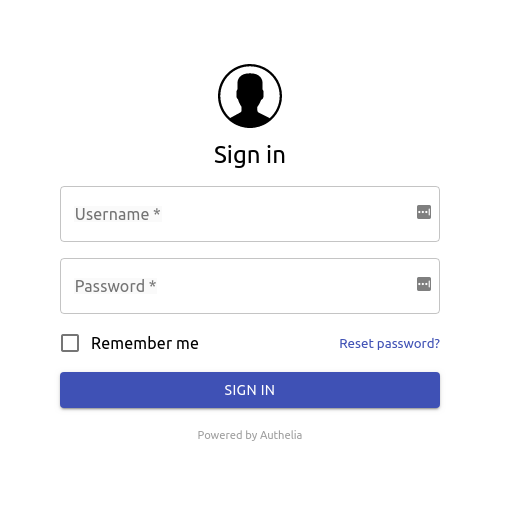
Below is what the login page looks like after you accepted all exceptions:

You can use one of the users listed in https://home.example.com:8080/. The rights granted to each user and group is also provided in the page as a list of rules.
At some point, you'll be required to register your second factor device. Since your security is Authelia's priority, it will send an email to the email address of the user to confirm the user identity. Since you are running a test environment, a fake webmail called MailCatcher has been deployed for you to check out the email and confirm your identity. The webmail is accessible at http://mail.example.com:8080.
Enjoy!
FAQ
What version of Docker and docker-compose should I use?
Here are the versions used for testing in Buildkite:
$ docker --version
Docker version 19.03.5, build 633a0ea838

$ docker-compose --version
docker-compose version 1.24.1, build unknown
How can I serve my application under example.com?
Don't worry, you don't need to own the domain example.com to test Authelia. Copy the following lines in your /etc/hosts.
192.168.240.100 home.example.com
192.168.240.100 login.example.com
192.168.240.100 singlefactor.example.com
192.168.240.100 public.example.com
192.168.240.100 secure.example.com
192.168.240.100 mail.example.com
192.168.240.100 mx1.mail.example.com
192.168.240.100 is the IP attributed by Docker to the reverse proxy. Once done
you can access the listed sub-domains from your browser and they will target
the reverse proxy.
What should I do if I want to contribute?
You can refer to the dedicated documentation here.